
Designing for wood movement
Wood is an amazing material to work with. Perhaps it’s because for 99.9% of our time on earth we have lived in natural environments, or maybe being surrounded by man-made materials makes us value nature all the more. Either way, from my experience the satisfaction that comes from working with your hands is only enhanced by doing so with this natural material.
However, there is one thing that is equally fascinating and frustrating when it comes to working with wood. It MOVES!
Even after being chopped down, timber is constantly trying to achieve an equilibrium with the moisture content in that of its surroundings. We see this in the way it cups, swells and shrinks, and considering the time and effort that goes into creating a precisely made piece of furniture, that can be extremely frustrating for the maker, not to mention the frustration and disappointment on the customer’s end.
A good understanding of why this happens and how you can avoid it is the foundation to creating well-designed furniture. Here are three ways that you can design with the movement of the wood in mind (or in other words, three ways to minimise wood movement in your work).

1) Minimising cupping: Edge jointing.
This is woodworking 101, yet I’ve seen very well-established furniture/woodworking manufacturers get this wrong. And the piece has failed as a result.
When you look at the structure of a tree, you can see quite clearly that it’s made up of rings. The rings in your timber are going to want to flatten out. Often this results in the wood cupping (see diagram —>).
To avoid this - or at least minimise it - it’s best to break down each component into narrower strips of timber and glue them back together, but orientate the grain in the way laid out in my diagram. By flipping alternate pieces, the cupping of each piece is limited by that of its neighbour’s and therefore the component as a whole is much more likely to stay flat.
2) Allowing for expansion and contraction: Tongue and groove
Not only does wood want to cup, but it also has a tendency to expand and contract across its width. If it’s in a more humid environment, the wood will absorb moisture and expand, whereas water leaving the timber causes shrinkage.
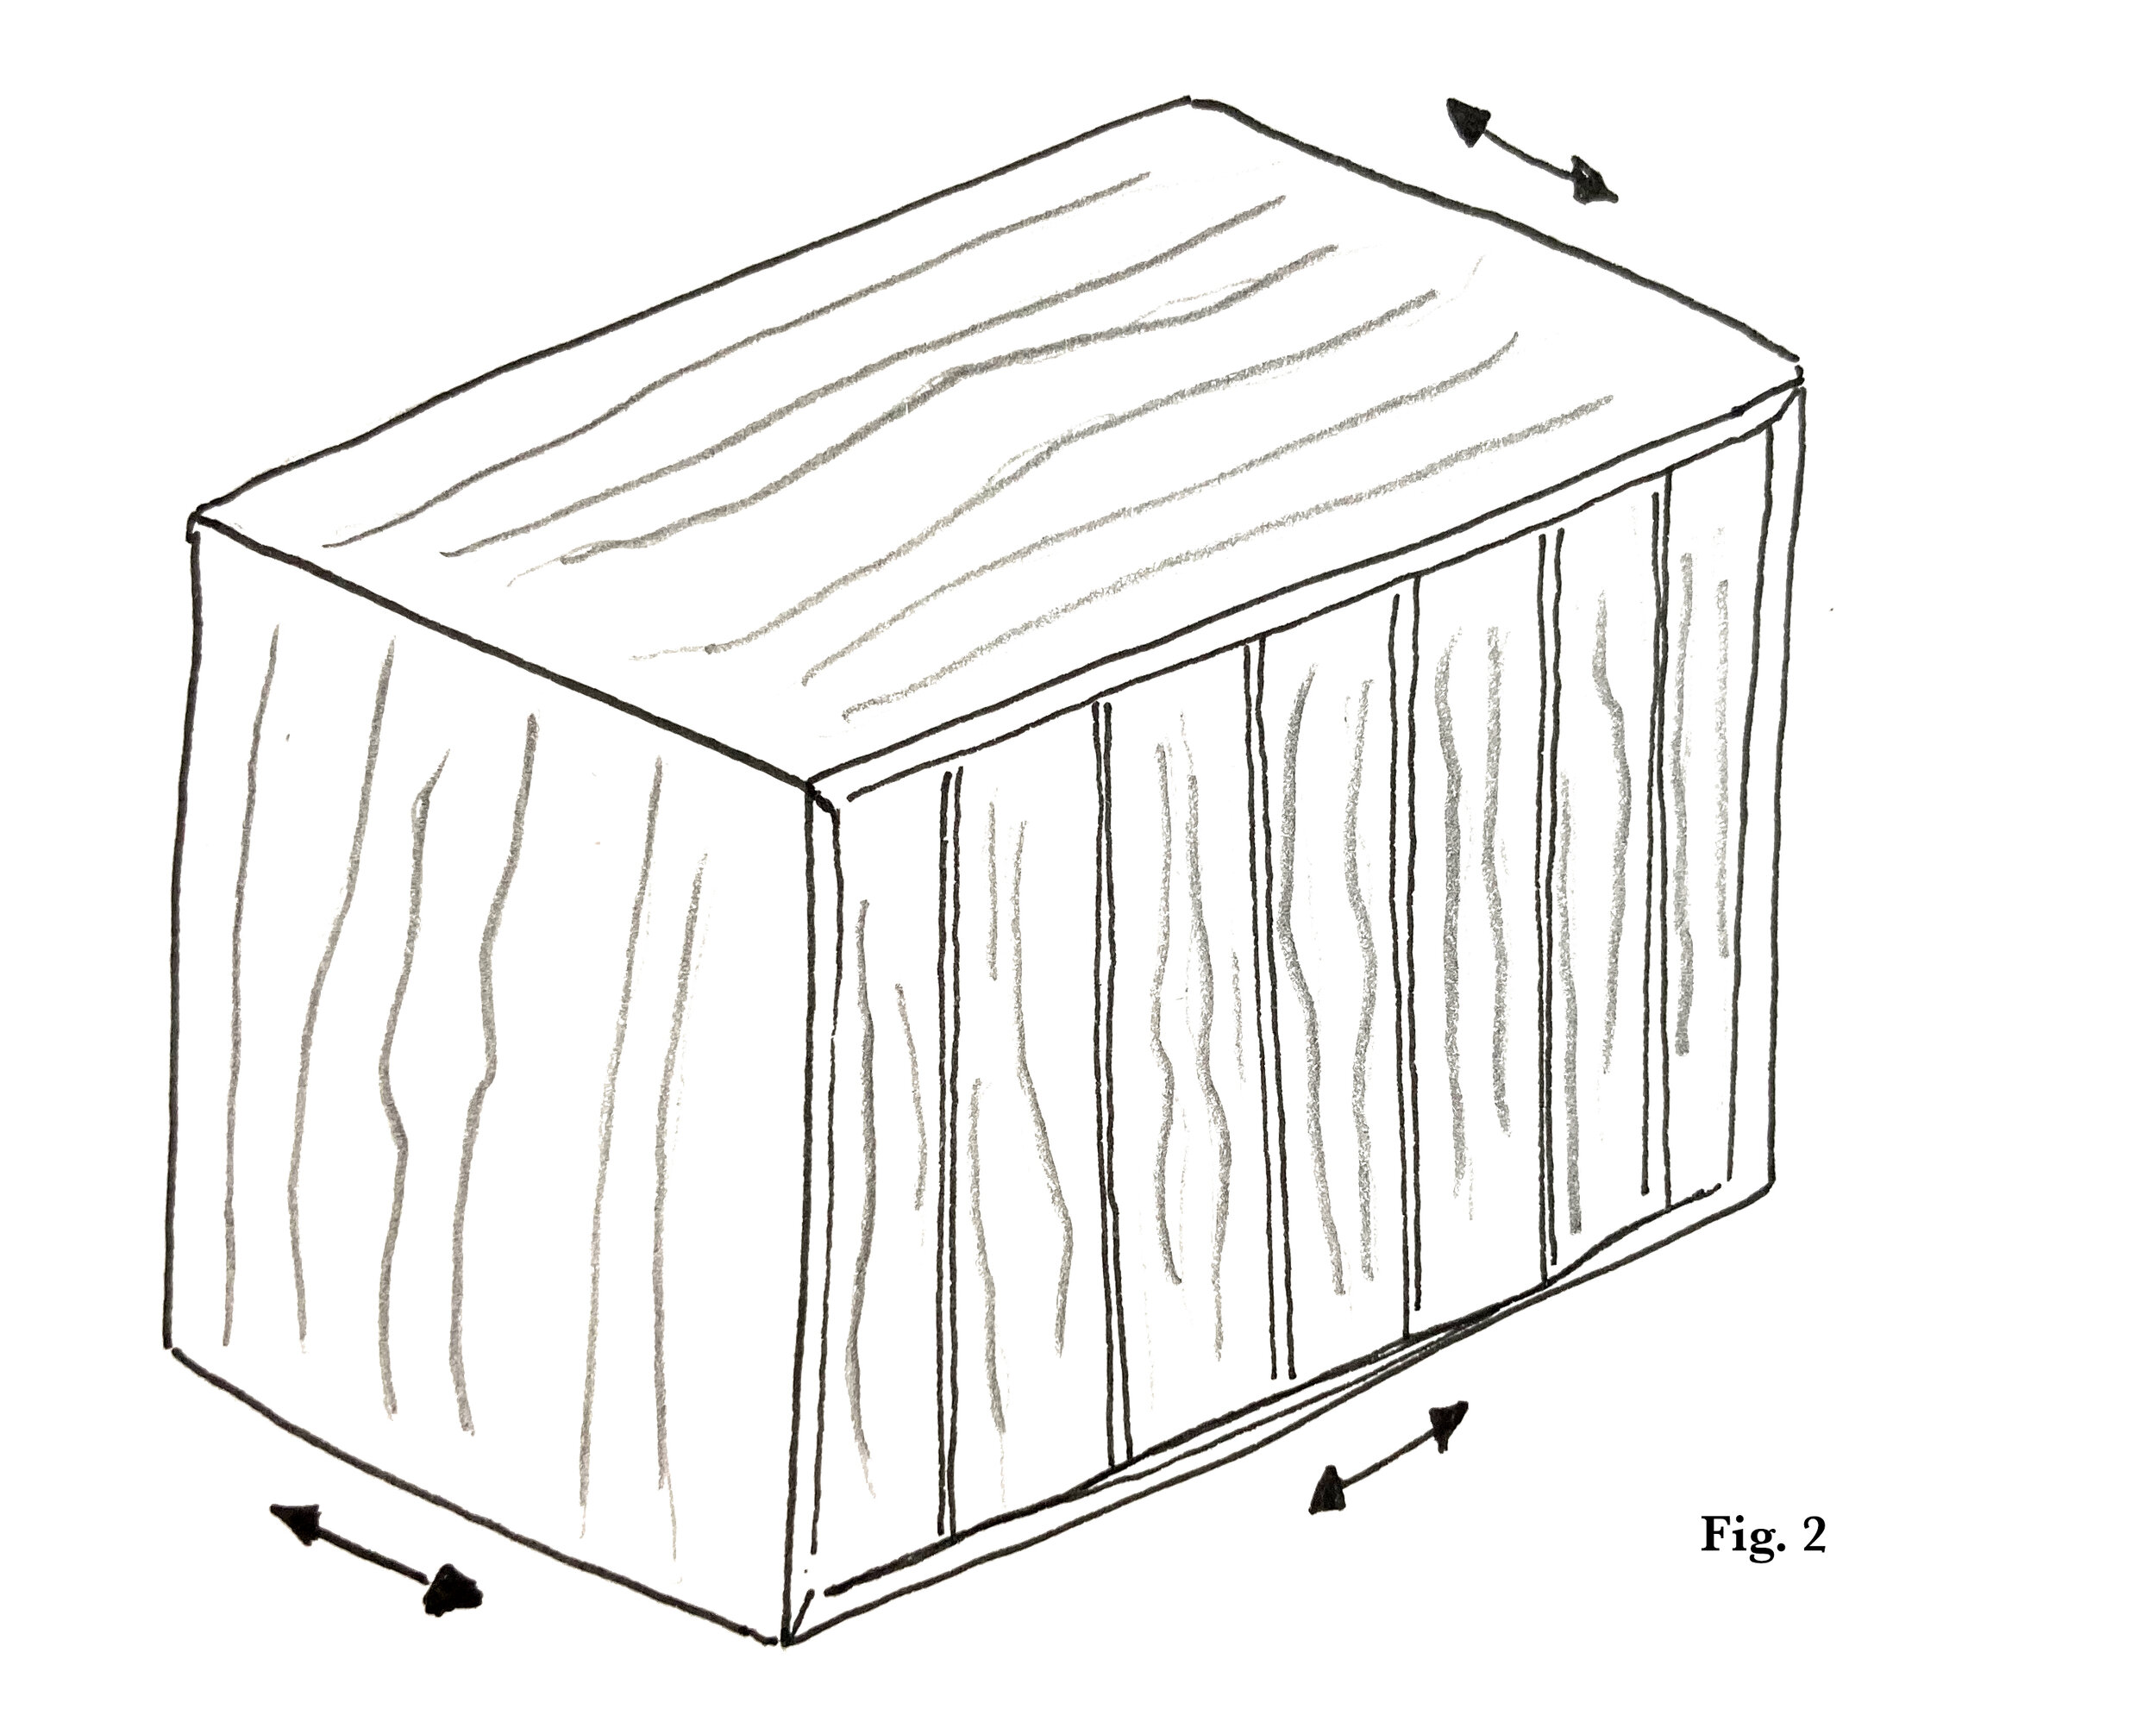
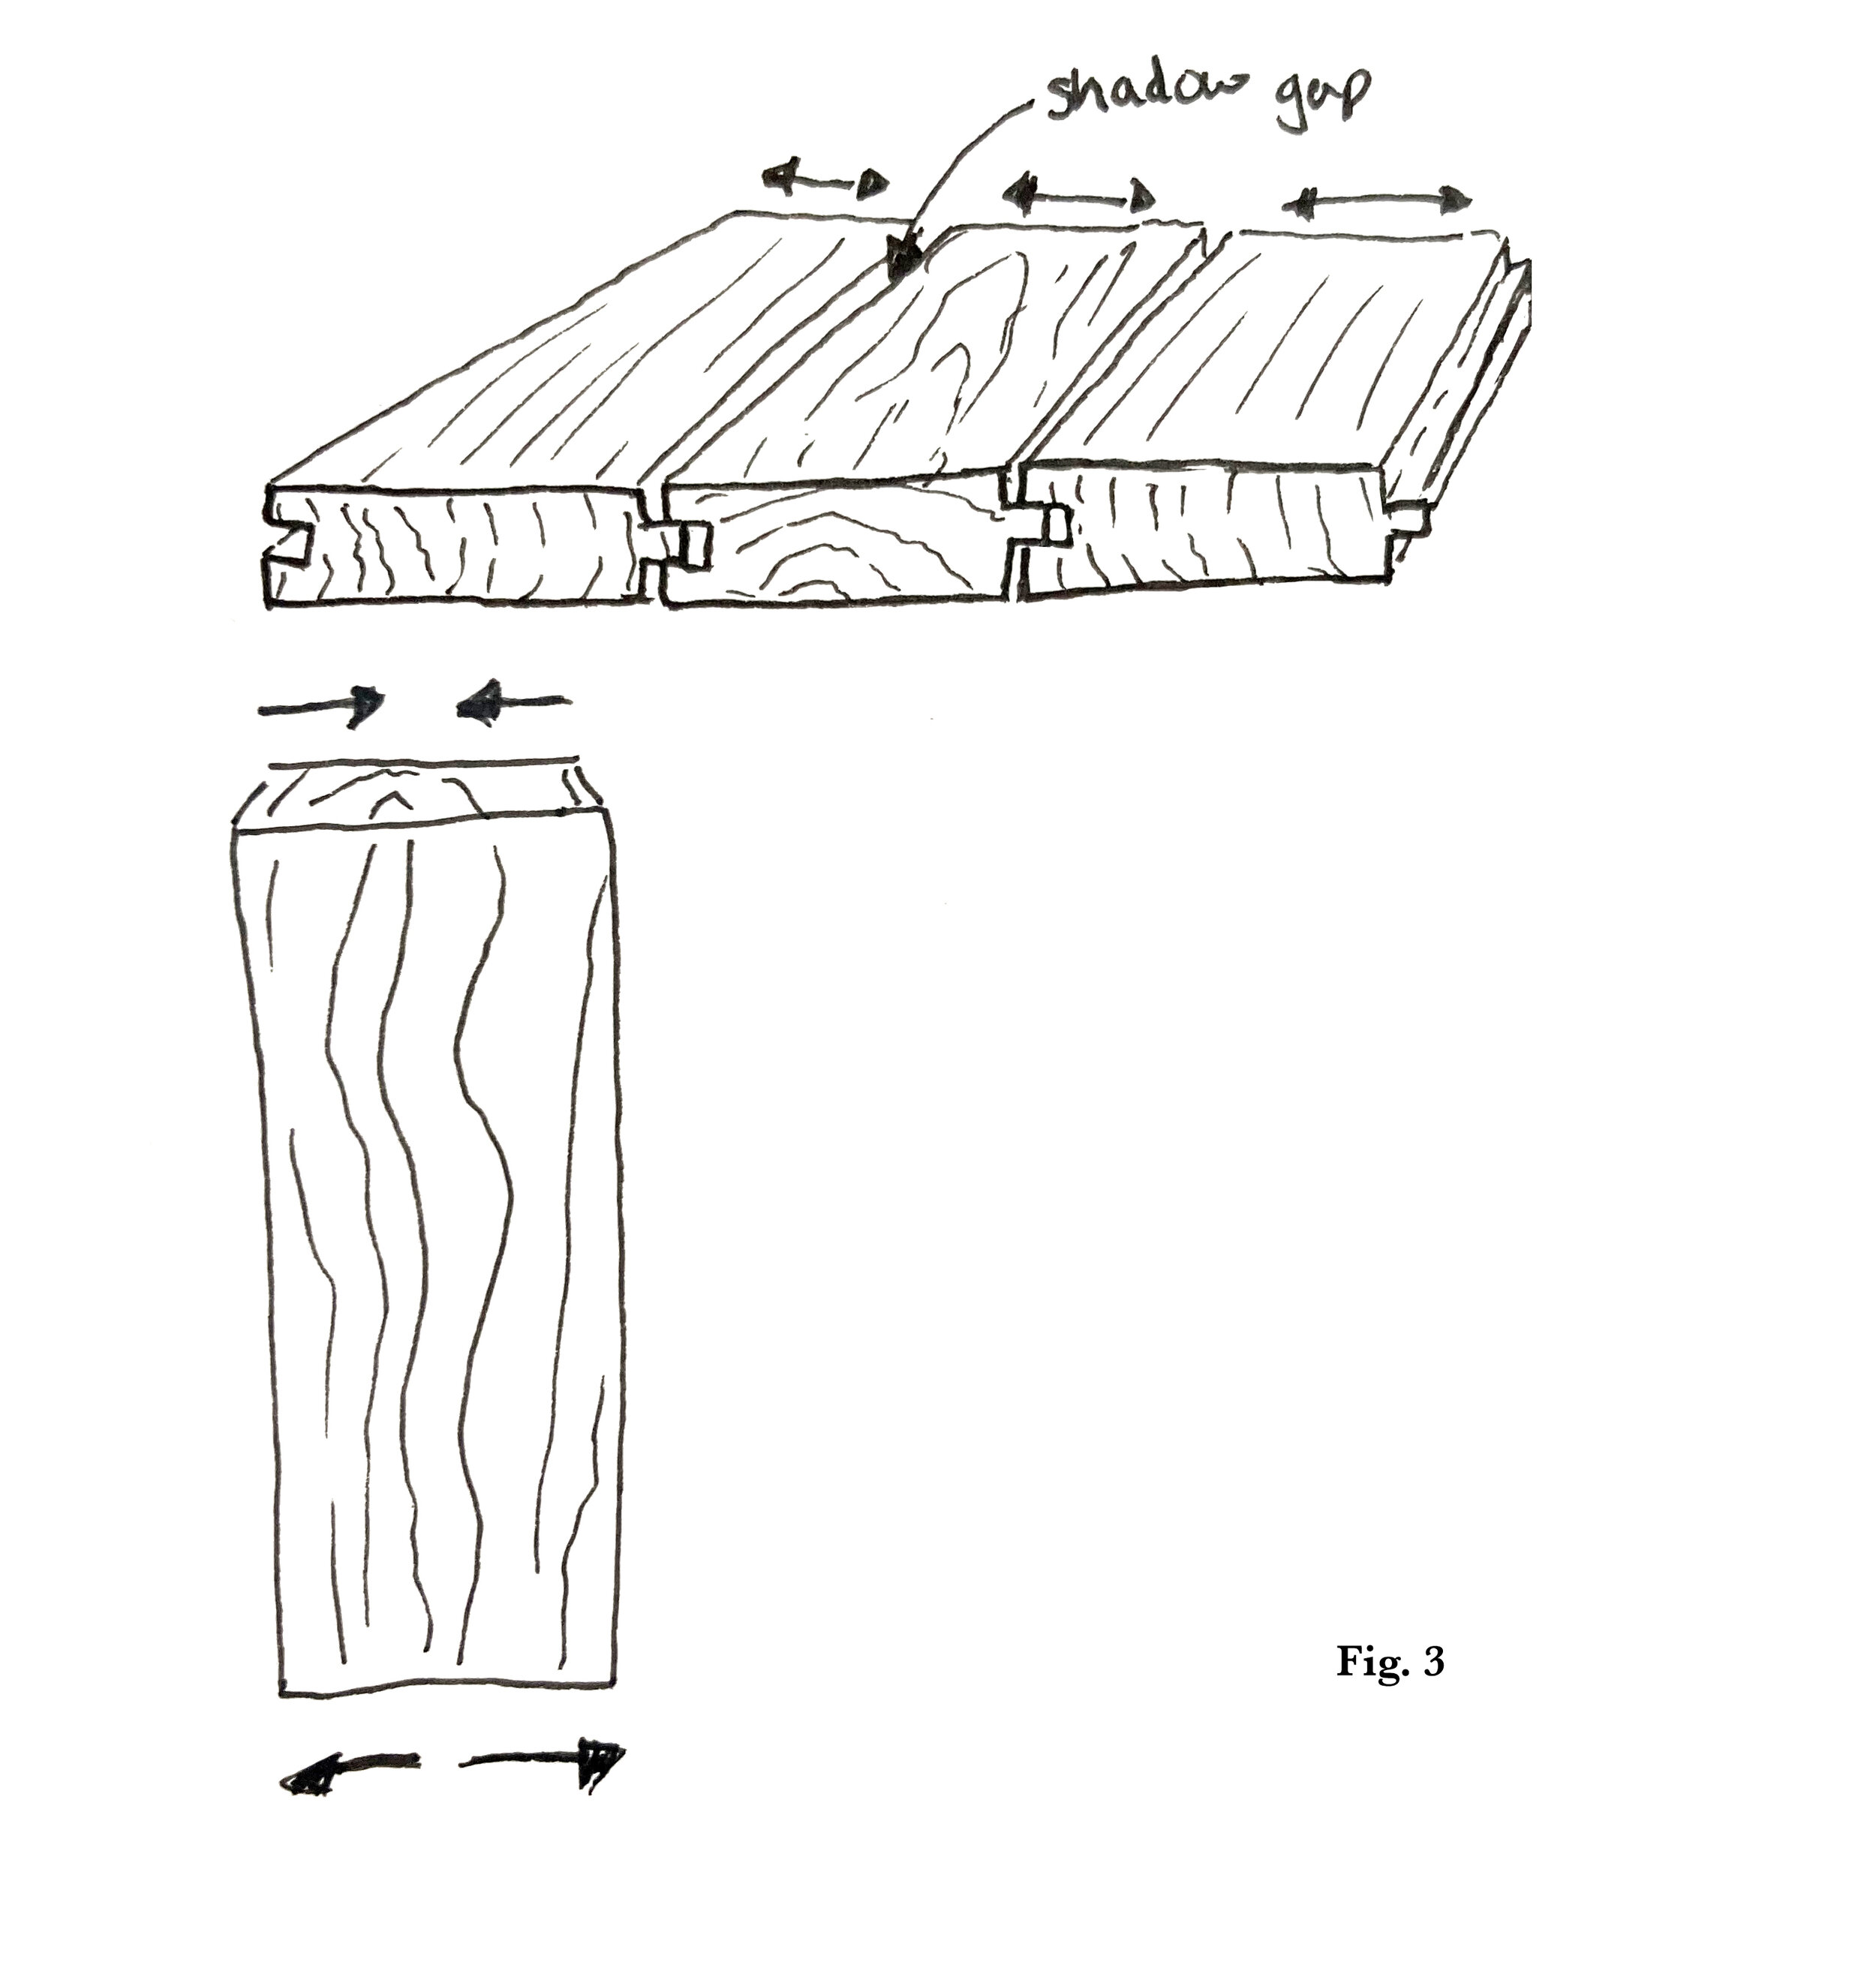
When you’re working with a panel that’s to fit within a carcase, this movement can reduce the integrity of the piece. In Fig. 2 the cabinet has been designed so that any movement in the top, bottom or sides all happens together, across the same plane. If the back of this cabinet was one solid piece, any expansion would put pressure on the side pieces - potentially separating the joint where the sides meet the top and bottom - and any shrinkage would cause gaps to appear at either end of the back panel. To overcome this, tongue and groove joints can be used. See fig.3. These joints break the component down once again into narrower strips. Any movement is accommodated for within the joints, and a purposeful shadow line means that any changes will not be very noticeable.

3) Frame and panel
Taking into consideration the ways that we now know wood can move, it can be very frustrating when, for example, a door that has been carefully fit with an even shadow gap around its border starts to expand and contract. Expansion would limit the function of the door, causing it to become too tightly-fitted, and shrinkage can lead to unusually large gaps around the edge.
In the same way that the tongue and groove joint allows for movement across the width of a board, the frame and panel allows wiggle room within the central panel, but the outer borders of the door frame remain fairly stable. The grooves in the frame are deep enough to allow maximum expansion and contraction (usually calculated as 1mm for each 100mm width of wood in either direction, therefore a 300mm panel requires a groove depth of at least 3mm all round). This ensures minimal movement and a much better fit for your cabinet door.